Monday, 27 July 2015

Seasons Greetings Card - Christmas In July for Couture Creations.


#couturecreationsaus

Welcome to another day at Couture Creations Headquarters.

It's hard to believe that we are already half way through the year. And like me you might be thinking where the heck did that 6 months go?? Before we know it, Christmas will be here. So I'm determined to get an early  start on my Christmas cards this year. 

Today I'm going to share with you a very easy and quick Christmas card. 
Couture's Christmas Emporium Collection is just gorgeous, and I'm
 excited to be working with these gorgeous papers in blues and greys. 


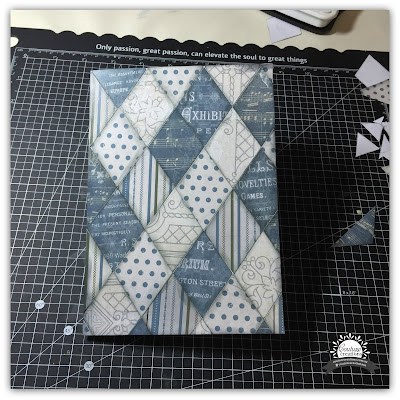
To start my card, I've die cut lots of diamonds with the smallest Nesting Diamonds die in various patterned papers. This is perfect for using up scraps and left overs pieces that
 might not be big enough to use elsewhere.  


I've cut 40 diamonds to fit my 5x7 card, and have then inked around the edges.
 I'll have a few die cuts left over to use as corner bits. 


I've covered the front of my card with 18mm double sided tape. 
This will make it very easy to assembly my pattern. 


Starting at the left corner, I've lined up my diamonds with the corner of the card and then along the top. Once I was happy with where the top line was in place,  it's just like fitting together a jigsaw puzzle. But the best part - there is no wrong place! You can add your pieces how ever you like. I tried to make sure that the same patterned paper didn't touch, 
so it looks very random.  


Continue arranging the  diamonds until the card front is full. 


If there are any little gaps just add some
Of the extra diamonds and cut off necessary. 


Turn your card over and trim the excess paper flush with the card.


c
Mount the "Seasons Greetings" onto coordinating paper and then back with 
12mm foam mounting tape for dimension. 


Place the greeting down the bottom of your card and add 
large pearls at the intersection of each diamonds. 


And we're done! 
It's quick & easy (perfect if you need to make several) and a fantastic way to use up your scraps.  Which means we can save money...which means....more money for new stash! 
I can't wait to use this design to make up some birthday cards as well. 

How soon will you start on your Christmas cards?  


Thanks for stopping by.


Be sure to check the Couture Creations Blog to be inspired 
by the amazing ladies on the Design Team. 
You can also follow Couture Creations on


Thursday, 9 July 2015

Love - Couture Creations & Hearts Ease

Hello again crafters! 

Thanks for joining us again at Couture Creations. 

Today I'm sharing a layout using the beautiful Hearts Ease Collection
I just love the rich purples hues and script pattered papers, and thought it was perfect for
 this wedding photo of mine. It's certainly doesn't seem like it was nearly 16 years ago!

So let's get making! 


I love buying paper in paper pads, but then I sometimes get a bit overwhelmed 
by the prettiness of the papers, and I want to use them all! 
This layout let me use 10 different patterns, so I can finally use lots of gorgeous papers at once!
 But it would also be perfect to use up those off cuts of paper we love so much and simply 
can't bare to throw out.  (Please tell me i'm not the only one!) 

To start with I've chosen 8 of my favourite papers in the Hearts Ease Collection
And because they are double sided I'll also be using the back and front of a few.  


Are they just beautiful?  And coordinate so well together. 
My favourite two at the moment are Small Pansies & Pansy Tune. 


I've cut strips of the patterned paper in varying sizes (no right or wrong people!) 
and distressed one edge with my non stick scissors


Grab a piece of cardstock (it won't matter what colour/type as it will be completely hidden) and cut down to 11" 1/2 x 11"1/2. Start to stick down your strips, layering them over the piece before, so that the distressed edge is showing.   I've used the 18mm double sided tape to stick down my pieces. 


When you are happy with the overall design, flip over your cardstock and 
trim off any excess patterned paper. 


I've used a piece of Core'dinations cardstock in Purple Majesty as my back mat and distressed around all edges.   I love the way the deep purple compliments the patterned paper, and the lighter distressed edges add more detail. 


I splattered dark purple spritz over page and adhered 2 pieces of book paper over the strips. 
To add some dimension and depth to my photo, I first matted it on a few layers of tissue paper, then on another 3 layers of Hearts Ease Patterned paper.  Another layer of tissue paper and the stack has been mounted on 12mm foam tape, and placed it on top of the book paper. 
On the lower right corner of the photo I've placed the 'Love' sticker from the new Hearts Ease Sticker Sheet Combo, and a chipboard arrow sticker from the new Hearts Ease Chipboard Shapes. 
I've added some 2mm gemstones to the arrow and in the corners.


I've die cut 5 of the Tall Basket Flowers from the Kalini range 
and added them in opposite corners of the photo, adhering with glue spots.
Don't forget to use your Quick Release Die Paper when due cutting so your cuts just fall out of the die. 


And we're done!


Thanks for dropping by. 

Be sure to check the Couture Creations Blog to be inspired 
by the amazing ladies on the Design Team. 
You can also follow Couture Creations on
FacebookPinterestInstagram and Twitter. 


Couture Creations Products Used

CO724171 Hearts Ease Collection 12 x 12 Double Sided Paper, Through the Hourglass
CO724180 Hearts Ease Collection 12 x 12 Double Sided Paper, Pansy Tune
CO724181 Hearts Ease Collection 12 x 12 Double Sided Paper, Small Pansies
CO724173 Hearts Ease Collection 12 x 12 Double Sided Paper, Golden Frame
CO724192 Hearts Ease Collection 12 x 12 Double Sided Paper, Pansy Dreaming
CO724176 Hearts Ease Collection 12 x 12 Double Sided Paper, Orchard Delight
CO724183 Hearts Ease Collection 12 x 12 Double Sided Paper, Pansy Grid
CO724182 Hearts Ease Collection 12 x 12 Double Sided Paper, Pansy Background
CO724189 Hearts Ease Collection 12 x 12 Double Sided Paper, Pansies in a Line
CO724396 Hearts Ease Collection, 12" x 12" Sticker Combo Sheet 
CO724397 Hearts Ease Chipboard Shapes
CO724156 2mm Gemstones, Wisteria 
Have a crafty day! 
Tracey R
xx


Monday, 22 June 2015

Thinking of you layout & Sketch - Hearts Ease by Couture Creations

#couturecreationsaus

Welcome back crafters! 
Nice to see you again for some more Couture Creations inspiration. 

I love layout sketches!  Especially when I'm unsure where to start my layout.
It reminds me of following a recipe. 
I have a great starting point and can see where roughly where I want to end up, 
but I can change it up along the way.  There is no right or wrong! 
In saying that,  I have never drawn my own - until now! 
So I give you my very first, hot off the press layout sketch! Ta-da!

So let's get crafting! 


I created this layout (and sketch) around this darling photo of my grandma that I've been wanting to scrap for sometime.  This photo is particularly special to me as it was the last birthday we celebrated with her, as she left us 6 weeks before she would have turned 100.   Her birthday is in June, so she has been very much in our thoughts.  She was a true English lady - lover of all things floral (especially roses), cups of tea and loved a good morning tea!  She was particularly handy when it came to cooking, sewing and crafts - something I'm very thankful to have shared with her. 
Her favourite colour was purple so I can imagine she would have loved all the 
gorgeous purple tones in this Hearts Ease Collection.  


Firstly I chose two 12x12 papers from the Hearts Ease collection for the background.  Cutting one piece smaller than the other, I distressed the edges with my non-stick scissors and then inked all four sides.   I then stuck down this inked paper using 12mm doubled sided tape.  

To give some dimension and shimmer to the page I've heat embossed 
two of the stamps from the Borders and Butterflies stamp set. 
 It's such a quick and easy technique but the results are stunning.  
I've then added the book paper banner, cutting in half to maximise it's use - 
why waste paper when it  won't be seen? 


This layering technique is fabulous for using up scraps and offcuts, which is exactly what I've done here.  And since most of it will be covered by the photo it doesn't matter if you have small bits or how much they overlap. 

Using my sketch as a guide, I've layered 4 bits of Hearts Ease Patterned paper, and several pieces
from the Hearts Ease Ephemera pack to create the background.  
And this is where you can move pieces around, add bits or even take them away.  
Remember the sketch is just a guiding, a starting point. 
Once I was happy with the placement I have stuck everything down with 12mm double sided tape. 


I've doubled matted my photo on Hearts Ease Patterned paper and then on purple Core'dinations cardstock, and distressed around the edges,  I've added 2 corners from the Ephemera pack to the photo and then mounted the photo with foam mounting tape to give the photo some height. 


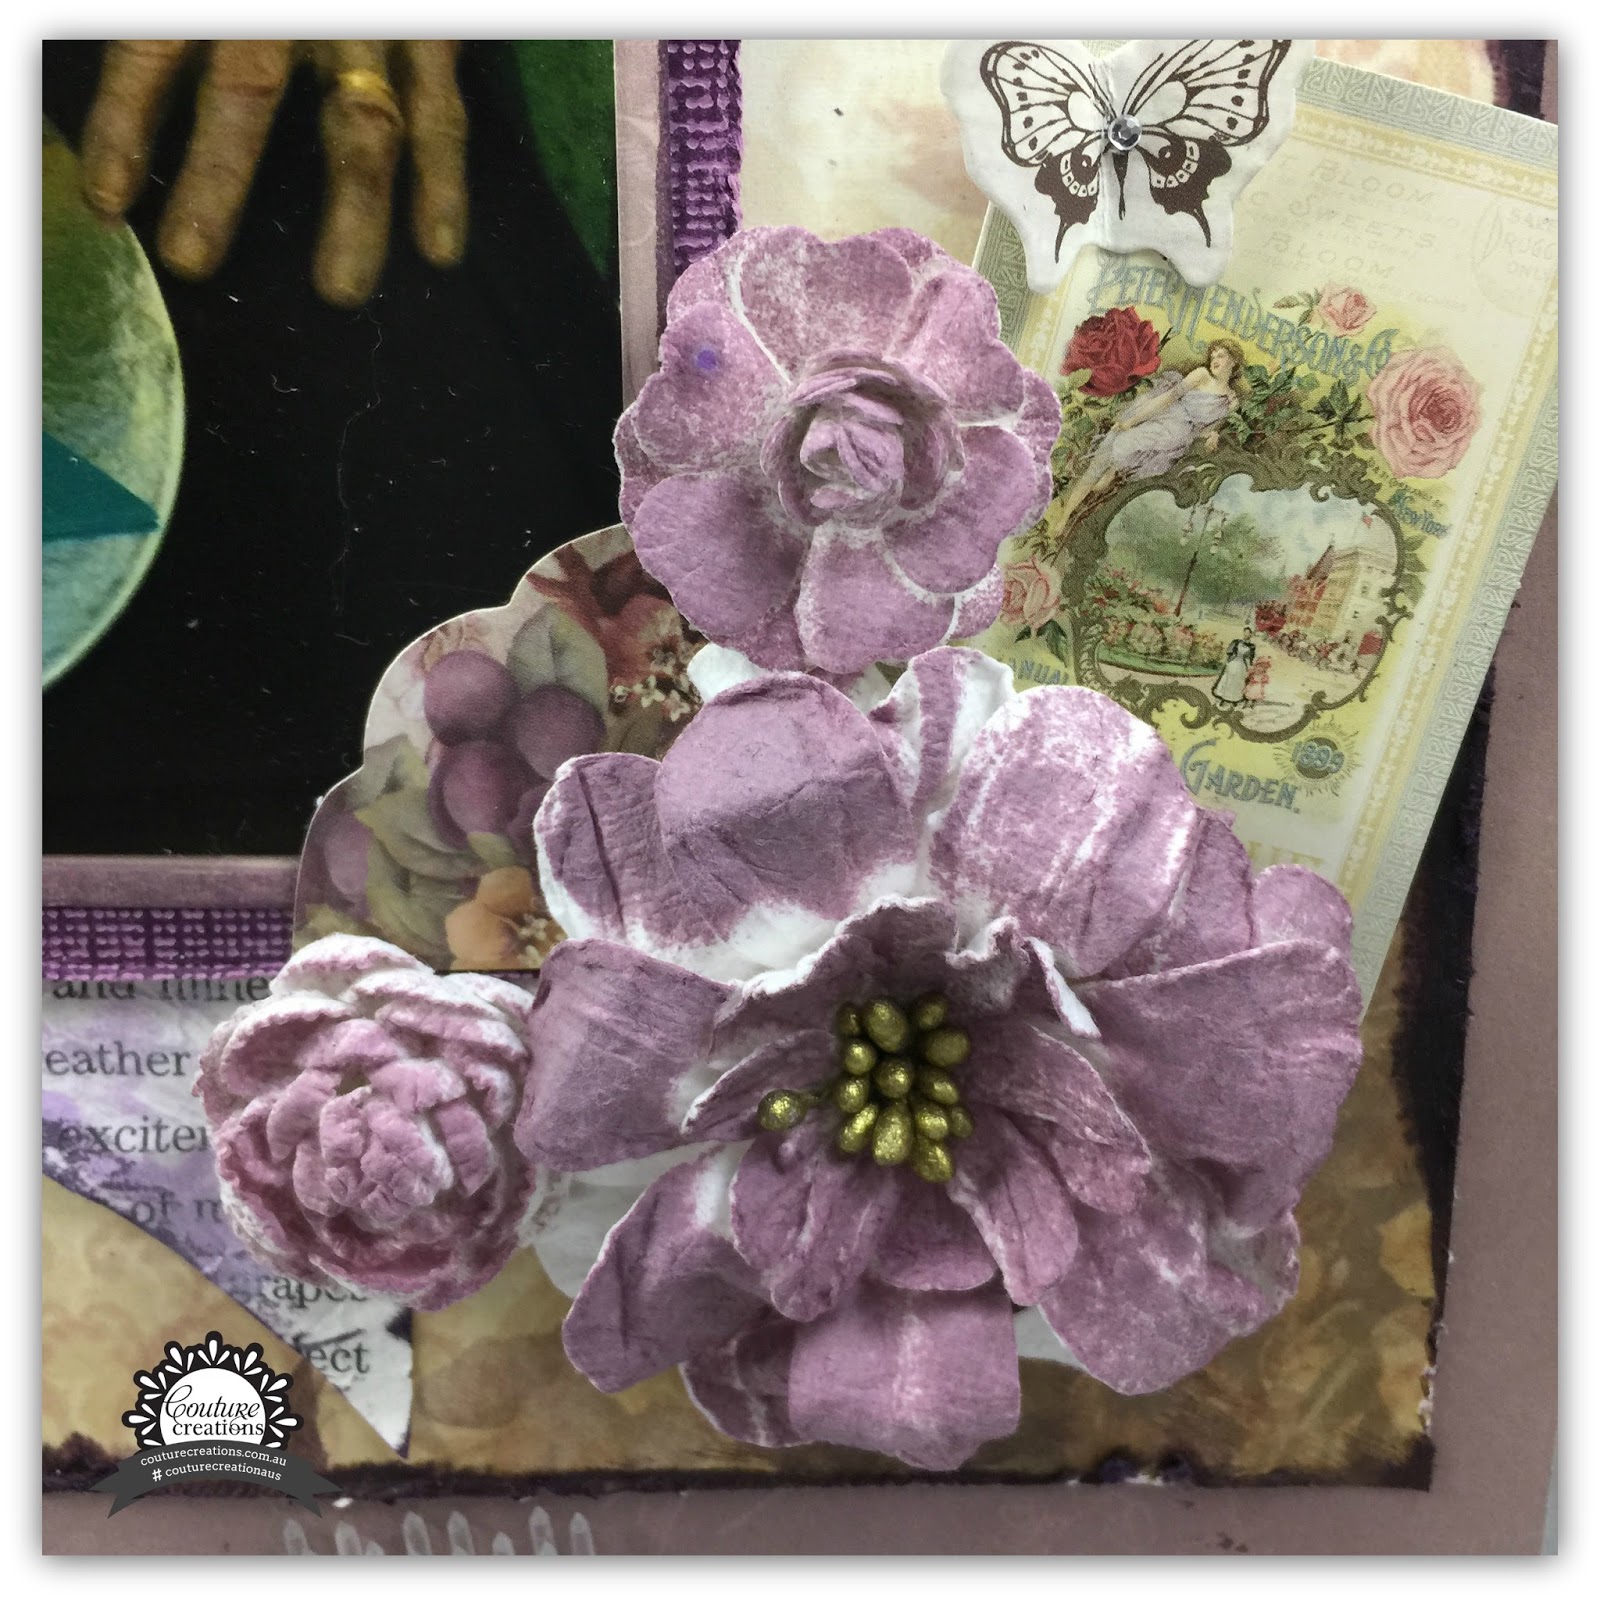
The white of the Bulk Flowers was a bit stark for this layout so I have spritzed them with a matching purple spray.  I wanted to have some white still visible so it was only a light coat and after they had dried I also ruffled the petals up.  But you can make them as light or as dark as you want. 
I've adhered the 3 flowers with Craft Glue Spots and slipped a vintagey card and a small butterfly (both from the Ephemera pack) under the flowers.


For the title I've used one of the new Hearts Ease Chipboard Stickers "Thinking of You' and attached to the layout with foam mounting tape.  I've added my favourite 2mm Gemstones in crystal to highlight other embellishments and draw the eye to them.  You can see them on the embossed butterfly and the chipboard title, on the tiny butterfly near the flowers and around the patterned paper and embossed borders.    


To finish off the layout, below the title I've ave added an embellishment cluster with several pieces from the Ephemera pack (pocket watch, arrow and tag) and a few items from my own stash. 


So happy birthday Grandma!  
You will be forever loved, and this June many cups of tea & scones will be had in your honour. 


Thanks for dropping by. 

Be sure to check the Couture Creations Blog to be inspired 
by the amazing ladies on the Design Team. 
You can also follow Couture Creations on

FacebookPinterestInstagram and Twitter. 


Have a crafty day! 
Tracey R
xx


Monday, 8 June 2015

Love Card - Couture Creations

#couturecreationsaus

Hello again crafter! Today I'm sharing some of the beautiful Hearts Ease Collection
from Couture Creations. 

Today I'm excited to show you this card I've made, perfect to celebrate a wedding or anniversary. 


Let's get making!


I've chosen a matching rich purple Core'dinations cardstock as the mat for my card, and cut it to fit my card. I've then die cut with one of the Heart Core Nesting Dies to make a window in the cardstock. 


I've embossed my cardstock with the Hearts Ease Tied Together Embossing folder. 


TIP! You get a much crisper and raised embossed pattern if you cut FIRST then emboss. 
You can see both here - cut then emboss on the left, emboss then cut on the right. 
I find that if you cut second the second pass through the die cutting machine flattens the pattern somewhat.  But in saying that, it might be a look you're after - it's up to you. 


I've then distressed the cardstock 2 ways - using the Couture Creations Sanding block on the pattern, and the Non-Stick scissors around the edges. 


Next I've chosen my patterned paper background and stuck it behind the window. With the different patterns in the Hearts Ease Patterned Paper Collection there are so many beautiful images you can use.  Simply lay the card window over the patterned paper and until your happy with the look. 


Using green Core'dinations cardstock I've cut 2 of the Vintage Branch die from the Vintage Rose Collection to use as foliage and placed them to the left of the heart window, 
attaching with the Craft Glue Spots.  Remember to always use your Quick Release Die Paper especially for intricate dies like this one.


I've spritzed an English Rose Flower purple and opened it up, placing a crystal classic gemstone in the middle, and adhered it on top of the tree die cuts with  Craft Glue Spots.

To add a sentiment to this card I have used the Hearts Ease Time Goes On Clear Stamps  and stamped the 'Love' with versa mark ink and then heat embossed with gold embossing powder.  I love how the gold just jumps off the card.


I've cut the embossed Love down and flagged off the ends, inked around the edges and adhered with 6mm Foam Tape at the bottom of the heart. 


Simple, effective, and made with love.  Just another way to use this stunning Hearts Ease Collection. 


I'd love to see how you use your Hearts Ease stash!

Thanks for dropping by.