Showing posts with label glue spots. Show all posts

Saturday, 21 May 2016

Three Roses - Couture Creations


#couturecreations  #ulitmatecrafts

Another day, and another chance to share the beauty of Magnolia Lane with you.
Thanks for stopping by today - it's nice to see you!

My favourite die in Magnolia Lane collection without a doubt is Rose Cutting.  I love the intricacy of these dies and how versatile they are.  In March I made another project with this die that's on the Couture Creations blog -> Here, and I've been wanting to use it again.
And here is the card.  I love how the white die cuts just jump off the card.  
White is so classic. And goes with pretty much everything. 
So let's get crafting. 
I've cut several roses and leaves out in white cardstock.  By using the Quick Release Die Paper the cuts come out with just a tap - despite how detailed the dies are.  A really good idea is to cut extras especially in colours you use regularly.  I have a bowl of die cuts on my desk.  It saves getting my die cut machine out for just one cut and having them in sight means I'm more likely to use them. 
I've cut a piece of Magnolia Lane patterned paper that will become the background of my card. Measure your card and cut the paper slightly smaller.  I've chosen a pink paper, but any colour will work.  I've used three of the Rose die, and to make my cuts go further have snipped all the leaves apart.  That way i can tuck them into smaller places, and only use what I want.  I've attached both the roses and leaves with mini glue spots.  I really like to use the glue spots as they adhere the cuts in place straight away,  but are small enough not to be seen. I've put the spots in the middle of the roses and on the end of leaves.  And because only the middle is stuck down, they have a 3D floating appearance. 
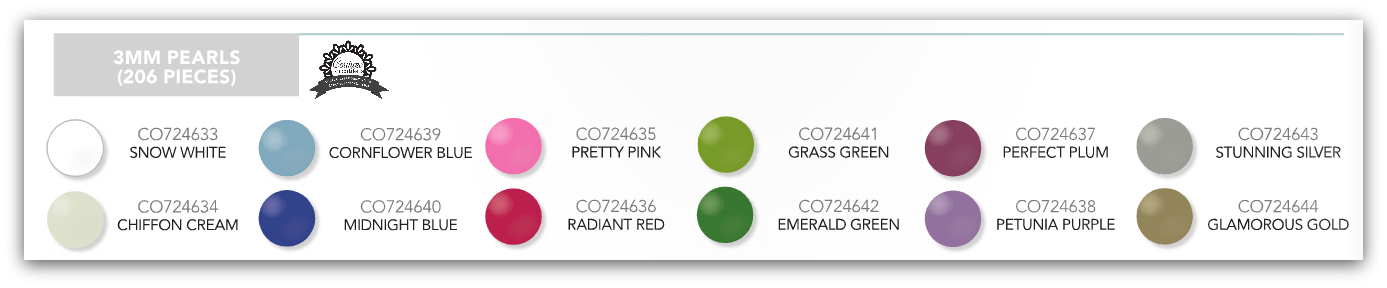
I've embellished with 3mm pearls (Snow White) in the middle of each rose and scattered some sequins for a bit of sparkle. I've used my Turbo Precision Glue Pen to adhere the sequins. I've also trimmed the overhanging rose in line with the background paper. 
I've attached the patterned paper to my white card with double sided tape. Towards the bottom of the card I've added a butterfly from the Ephemera pack mounted on a piece 3D Foam Strip. 
 
 And the card is complete.  Perfect for a birthday, thinking of you or even a wedding card.
Be sure to check the Couture Creations Blog to be inspired 
by the amazing ladies on the Design Team. 
You can also follow Couture Creations on
FacebookPinterestInstagram and Twitter.
ULT157523 Magnolia Lane Decorative Dies, Rose Cutting
ULT157515 Diecut Ephemera
CO721963 3D Foam Adhesive, 3D Foam Strips
CO721984 Doubled Sided Tape, 12mm 
CO724037 2 Way Glue, Turbo Precision Glue pen

Monday, 28 December 2015

Upcycled Floral Lantern - Couture Creations


#couturecreationsaus

Hello my crafty friends!
Tracey R here with you today. 

Christmas has been and gone for another year.  Seriously, 2015  has just gone in the blink of an eye! I hope you enjoyed some time with family & friends, and Santa found his way to you! And if there was crafty goodies under your tree even better!!

Today I'd like to share my 'Upcycled' Floral paper lantern, decorated with lots of pretty Couture Creations products. 
So let's get crafting! 
I found this paper lantern at my local $2 shop - for $2! 
They come in many sizes and colours - I chose a small white one (20cms) to match my flowers.Measure around the circumference of your lantern and cut the required lengths of of the scalloped border die (Simone's Style) from the Amaryllis collection.  (I used 3 lengths - 2 full lengths with a small section so they met. I've used this die several times - it's so versatile & a great addition to any die collection. 
Next I've die cut 5 of the Classic Vine (Vintage Rose Collection) in green Ultimate Crafts Card stock and then cut the vines in half. By doing this you can make your die cuts go further and with this particular die you can use it as foliage and smaller branches


Choosing a front point of my lantern, I've adhered the Beaded flowers (isn't the script pattern on these just gorgeous!!) using the Craft Glue Spots. You can add the flowers in any shape or pattern you like, but I've chosen to add them on an angle from the top to the bottom of the lantern. Amongst the flowers I've poked in pieces of the vine die (also using craft glue spots) to look like falling foliage. It also adds a nice pop of colour and contrast to all the white. 
And like that, another project is done. 

It looks really lovely lit at night too...
This was earlier in the night (so you can still see the flowers)
And when it's dark dark. 

I'm so happy with how this 'Upcycled Lantern' turned out. 
I'd love to see if you make one yourself.  


Thank you for visiting us at Couture Creations during 2015. 
I've loved being able to share such fun projects with you.
May your 2016 be happy, healthy and creative.  
See you next year! 


Thanks for dropping by. 

Thursday, 17 December 2015

Christmas Bon Bon - Couture Creations

#couturecreationsaus

Hi there crafters! 
Thanks for joining us again today at Couture Creations. 

Can you believe that Christmas is only DAYS away??? 
I'm still wondering where the year has gone.  2015 has just flown by! 

So today I'm sharing with you a way to combine Christmas and craft - what a perfect combination! 
 I found these gorgeous gold glitter Bon Bons and immediately thought they'd make beautiful place name holders at our Christmas Day lunch.  By using a few Couture Creations products to add some extra touches, you too can make gorgeous decorations to your Christmas table. 

So Let's get crafting! 
I started with a plain gold Bon Bon.  I've used a pre made one, but you could certainly make the actual Bon Bon yourself (Pinterest is your friend here!!) 
I've die cut a tag from black card stock, and 2 Holly leaves from green 
cardstock.  Both colours are from the new Ultimate Crafts card stock.  It's such a nice card stock to work with, if you haven't used it yet, I highly recommend it! To make a mat for the tag I've simply traced around the edge of the die on the back of our very new and exciting red glitter paper.  Pop your die cuts to the side - We'll come back and assemble our tag at the end.
Couture Creations has only just released this gorgeous pack of 10 glitter papers - helloooooo sparkle!  So many pretty colours to choose from.  And all importantly the glitter stays ON the paper!!! How many times have you made a project with glitter paper and get more on yourself? 

Using the scalloped die from the Simone's Style (Amaryllis Ornamental Lace Die Collection), I've die cut lengths from the red glitter paper and attached with glue spots around the middle of the Bon Bon, and on each of the handles (you know the bits you pull!).  By using the Quick Release Die Paper you get a clean cut first time. And the little bits just fall right out of the die. 

On to assembling the name plate. 
Now if you know the names of your guests, I'd suggest adding them before assembling the tags -it's easier to write on a flat surface.  But you can certainly complete your Bon Bons prior, and then write names on the day if you wish.  
It's totally up to you. Take your black tag, add 12mm foam tape to the back and mount on the red glitter paper. Attached the Holly Leaves (Christmas Eve Collection, Christmas Labels) to the black tag with your Turbo Precision Glue Pen (perfect for fine details) in opposite corners. 
On each of the Holly Leaves I've added these gorgeous 3mm Pearls.  They are brand new from Couture Creations and in 12 beautiful colours, compliment our classic range of coloured pearls perfectly.  I adore our 3mm Gemstones, but I can see these new tiny pearls will quickly become a new favourite. 
Once you've assembled the name tags add some more 12mm foam tape to the back of the glitter paper and stick to the front of the Bon Bon. 
And you're done!
A relatively quick and easy way to add some home made touches to bought decorations.  Your guests &/or family will love the personalised touch. 


I hope that you and your families have a very happy & safe Christmas. 
And I hope Santa leaves some crafty presents under your tree!
(Suggest he shop for the new Couture Creations goodies!!!)


Thanks for dropping by. 

Be sure to check the Couture Creations Blog to be inspired 
by the amazing ladies on the Design Team. 
You can also follow Couture Creations on
FacebookPinterestInstagram and Twitter. 


Couture Creations Products Used


Tuesday, 15 December 2015

Doiley Banner - Couture Creations


#couturecreationsaus

Thanks for visiting the Couture Creations blog today! 
Tracey R with you to share a name banner I made for my daughter. 

As soon as I saw the new Perfectly Petite Doilies range, 
I imagined them strung up with ribbons, and hanging on the wall.
I love tiny doilies on anything! And by using them for more than your cards or 
scrapbook layouts, you are getting even better value for your crafting dollar. 
This range is so versatile and petite, I can't wait to share them with you! 

So let's get crafting!
This name banner was a surprise for my daughter in her favourite colour green, but of course you can choose any colour you like.  They'd look gorgeous in the purple tones of our Hearts Ease Collection.

This project used the Dandie Floral die for the green letters in the middle and the 
Lotus Daily die for the white doilies either side of the name.  
Be sure to check out the entire range of Perfectly Petite Doilies here.
There are 12 in the set and they are just so pretty you'll want them all!

I cut the doilies from Core'dinations Cardstock and because I used the Quick Release Die Paper, they came  out beautifully after one pass.  No picking out the little bits! 
You'll need enough Dandie Floral Die cuts to spell your chose name or word, plus two for the ends, and 4 of the Lotus Daily dies.  I had two left over Dandie Floral dies from another project so I used them on the on either end. They were also inked with bronze so give a nice contrast.
I stamped the letters straight onto the Dandie Floral die cuts
And threaded all the doilies onto white and gold twine. 
I've punched some little circles from a piece of Vintage Rose paper and will placed two circles secured with a Mini Glue Spot between each doily.  This will keep them in place, but still allow for a little but of movement. 
Using the  LED Precision Tweezers & Mini Glue spots (I simply can't do without these!) 
I've adhered the two circles together catching the twine in the middle.  
Time for some flowers! 
I've coloured my white flowers (these ones are the new Tied Dyed & Jewelled Florettes) with green spritz to match my cardstock.  The Non-Stick Craft mat is the perfect place to do it! 
Not only does it clean up easily when you're done but you can also use the extra spritz!
I've simply put some white card stock on top of the left over spray and TA-DA! 
I just made my own coloured paper.  Perfect for another project - be it a card or on a scrapbook layout. You could even use it to die cut out! And you'll never get the same pattern twice. So you'll always have a one-of-a-kind background and even more exciting - that you made yourself.
 I've used Crystal Gemstones & Green Envy 2mm Gemstones to bling up my banner, before adding my flowers with Mini Glue Spots
The final touch is to raid your ribbon stash for coordinating colours and tie lengths at either end.
I just used a single knot, and love the shaggy look it gives. 
I've then added the final two doilies at each end to secure the twine. 
You could make this for any occasion - Christmas, Birthday, Christening, Wedding, New Baby etc
The possibilities are endless!


Be sure to check the Couture Creations Blog to be inspired 
by the amazing ladies on the Design Team. 
You can also follow Couture Creations on


FacebookPinterestInstagram and Twitter. 


Couture Creations Products Used


Have a crafty day! 
Tracey R
xx